Ah, dinner rolls—those little pillows of carb-heaven that have the power to transform any ordinary meal into a feast. There’s something magical about a fresh batch of homemade rolls, isn’t there? They remind me of family gatherings, where the air is filled with laughter and the warm, yeasty aroma wafting from the kitchen. My grandma used to bake them, and I swear, nothing compares to the feeling of biting into one of these soft, golden beauties straight from the oven. Maybe it’s the way they seem to melt in your mouth, or perhaps it’s simply nostalgia, but either way, these rolls are irresistible—like a cozy blanket for your taste buds.
I remember last Thanksgiving, my cousin dropped one on the floor, and our dog snatched it up before anyone could stop him. Even he couldn’t resist! But let’s be real—who could blame him? These dinner rolls are fluffy clouds of joy, and I promise, they’re not as complicated to make as you might think. So, let’s roll up our sleeves and dive into the process of creating something that everyone around the table will love. After all, isn’t that what cooking is all about? Sharing a little piece of happiness with those we care about.
Steps
- Begin by mixing warm milk, yeast, and a tablespoon of sugar in a large bowl. Cover the mixture and allow it to sit for about 5 minutes to activate the yeast.
- Add the rest of the sugar, an egg, softened butter, salt, and a cup of flour to the yeast mixture. Use a mixer to blend on low speed, scraping the bowl as needed, then gradually incorporate the remaining flour until the dough forms.
- Knead the dough by continuing to mix with a dough hook for 5 minutes, or do it manually on a floured surface for the same duration. The dough should be soft and slightly sticky; if too sticky, add small amounts of flour until manageable.
- Place the kneaded dough into a greased bowl, turning it to coat all sides. Cover and let it rise in a warm environment until it has doubled in size, which typically takes 1-2 hours.
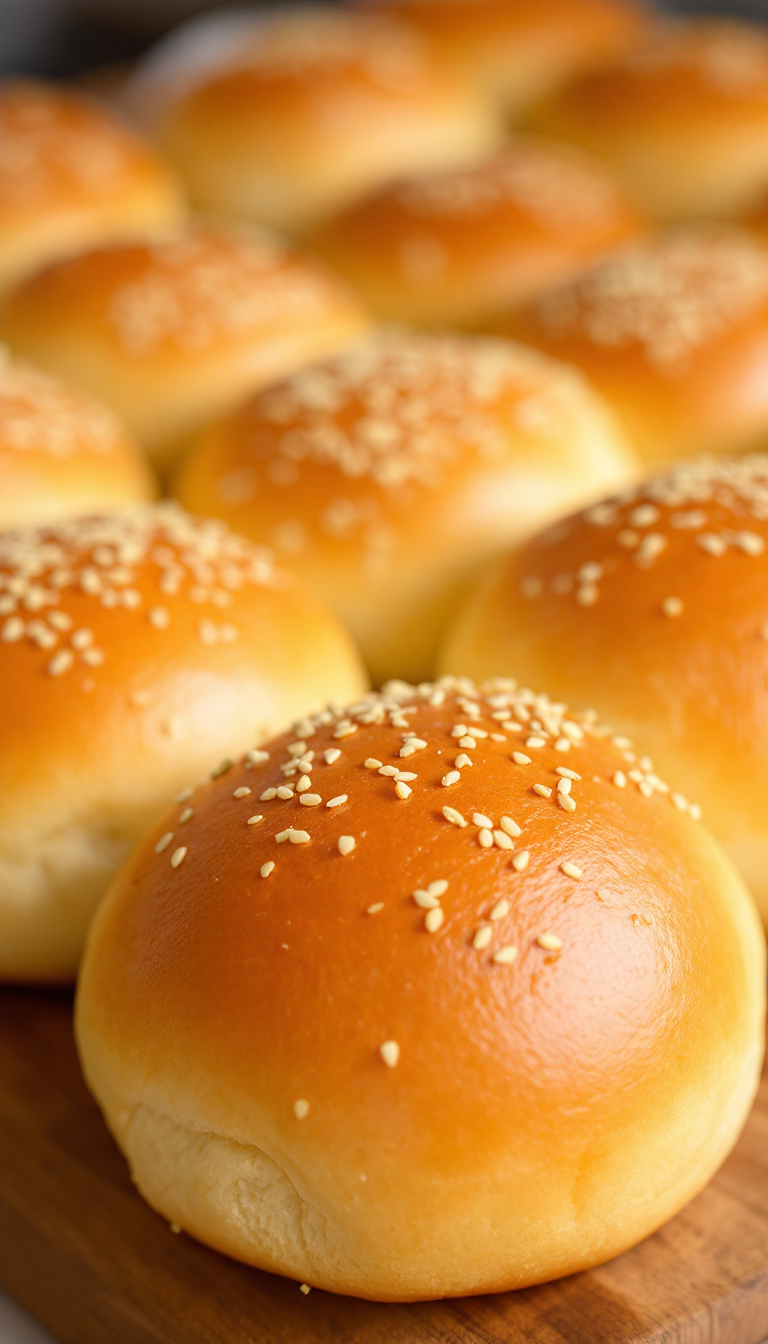
- Once risen, punch down the dough and divide it into 14-16 equal pieces. Shape each piece into a smooth ball and arrange them in a greased baking pan.
- Cover the shaped rolls and let them rise for another hour until they become puffy. Preheat your oven to 350°F (177°C) as they rise.
- Bake the rolls for 20-25 minutes until they turn golden brown, rotating the pan halfway through. If the tops brown too quickly, cover them with foil. Optionally, brush with honey butter after baking.

Ingredients
- 1 cup (240ml) whole milk, heated to approximately 110°F (43°C)
- 2 and 1/4 teaspoons instant yeast (such as Platinum Yeast by Red Star), equivalent to one standard packet
- 2 tablespoons granulated sugar, divided
- 1 large egg
- 1/4 cup (4 tablespoons or 56g) unsalted butter, softened to room temperature and divided into 4 pieces
- 1 teaspoon salt
- 3 cups (390g) of either all-purpose or bread flour, measured by spooning and leveling
- Optional topping: 2 tablespoons (28g) melted unsalted butter combined with 1 tablespoon honey
FAQ
- Can I use a different type of milk instead of whole milk?
- Yes, you can use non-dairy or low-fat milk, but whole milk is recommended for the best flavor and texture.
- What if my dough is too sticky to knead?
- If the dough is too sticky, you can add more flour, one tablespoon at a time, until it becomes manageable. Be careful not to add too much as you want the dough to remain soft.
- How can I make these dinner rolls ahead of time?
- To make the rolls ahead, you can refrigerate the shaped rolls for up to 16 hours. Before baking, let them rise at room temperature for 1-2 hours. Alternatively, you can freeze the shaped or baked rolls for later use.
- What is the difference between using all-purpose flour and bread flour?
- All-purpose flour is versatile and convenient, while bread flour will give the rolls a chewier texture. Both types will result in soft and fluffy rolls.
- How can I make flavored variations of these rolls?
- You can add ingredients like rosemary, cheddar cheese, or garlic and herbs when adding the flour to create different flavored dinner rolls.
Tips
- Monitor Yeast Freshness: Always check the expiration date on your yeast package to ensure it’s active. Using expired yeast can result in rolls that don’t rise properly.
- Accurate Flour Measurement: Avoid dense rolls by measuring flour accurately. Use the spoon and level method rather than scooping directly from the bag, which can compact the flour and lead to using more than needed.
- Control Dough Stickiness: If your dough becomes too sticky during kneading, sprinkle a small amount of flour, one teaspoon at a time, until the dough is manageable. Be cautious not to add too much flour, as this can result in dry rolls.
- Make-Ahead Convenience: For fresh rolls without the rush, prepare and shape the dough ahead of time. Refrigerate the shaped rolls for up to 16 hours, then allow them to rise at room temperature for 1-2 hours before baking. This is perfect for events like holiday dinners.
Equipment
- Electric Stand Mixer – Useful for mixing and kneading the dough with a paddle attachment or dough hook.
- 9×13-inch Glass Baking Pan – Preferred for baking the rolls; ensures even browning.
- Bench Scraper – Helpful for dividing and shaping the dough.
- Pastry Brush – Useful for applying melted butter or honey butter topping on the rolls.