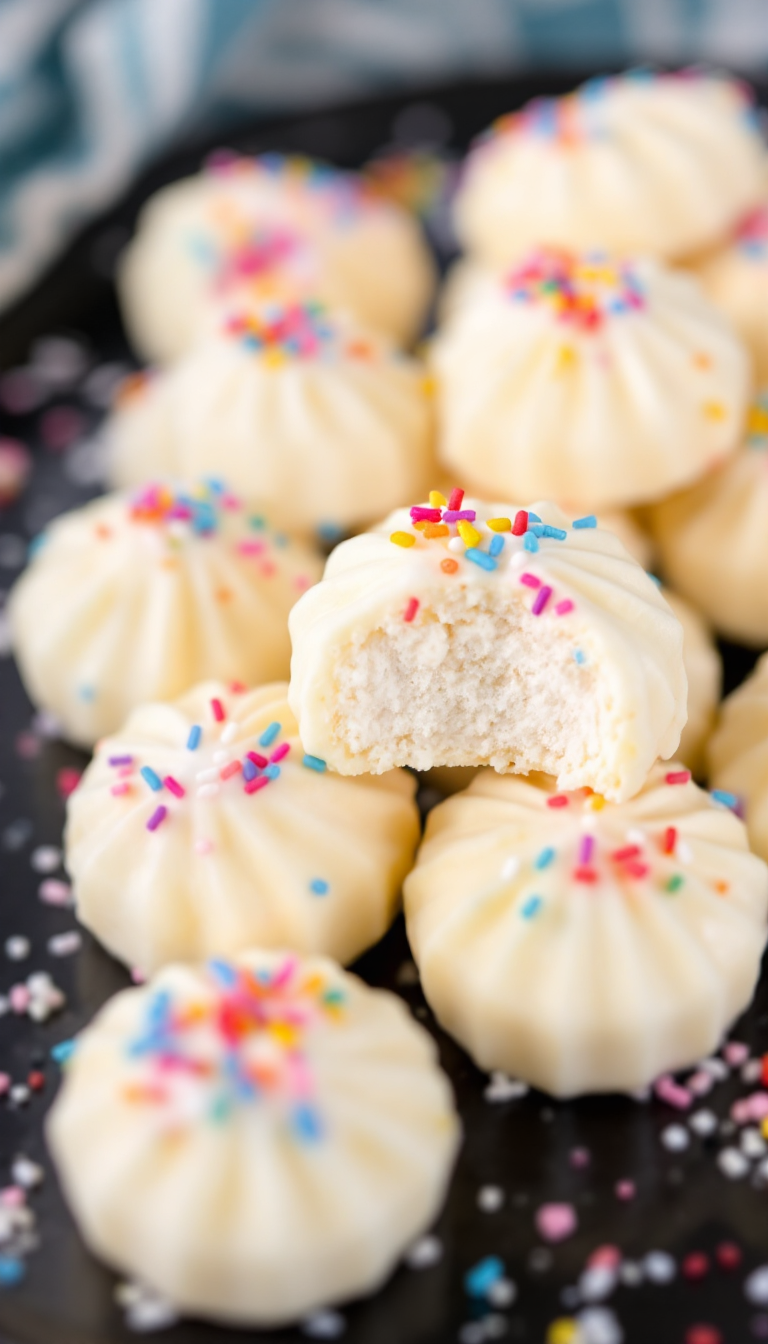
After a hearty dinner, there’s something truly magical about indulging in a cool, refreshing mint. Remember that time when you had a sumptuous meal, and the only thing missing was the perfect after-dinner treat? These homemade after-dinner mints promise a melt-in-your-mouth experience—like a gentle breeze on a summer evening.
Steps
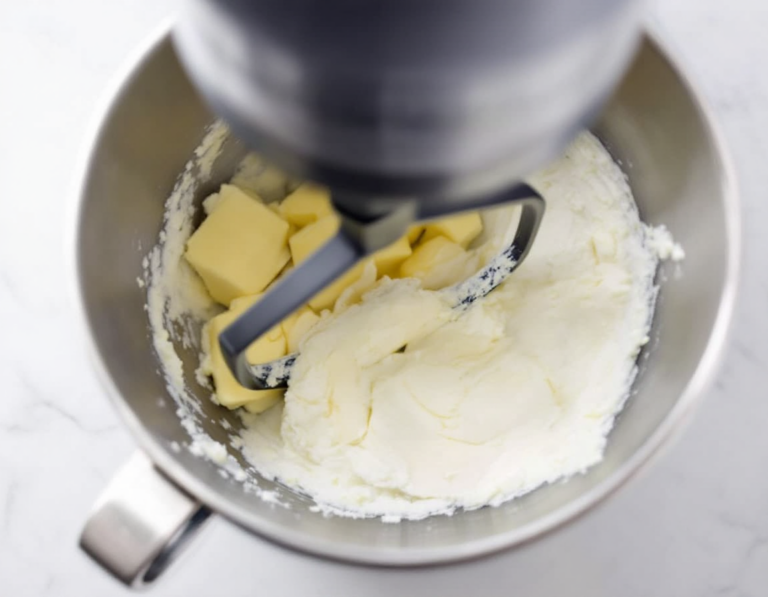
- Place softened butter into a stand mixer and blend until it achieves a smooth consistency.
- Gradually combine powdered sugar, half and half, vanilla extract, peppermint oil, and a pinch of salt. Mix on a low setting until the mixture becomes dry and crumbly. If necessary, add a small additional amount of half and half to ensure the mixture is not too dry.
- Introduce a few drops of yellow food coloring, increase the mixer speed to high, and continue blending until a smooth dough forms.
- Lightly dust a flat surface with powdered sugar, then extract the dough from the mixing bowl.
- Take a small portion of the dough, roughly the size of your palm, while keeping the remaining dough covered with a damp paper towel to prevent drying.
- Roll the dough piece on the sugared surface into a long, thin snake approximately 1/2 inch in diameter.
- Slice the rolled dough into small, bite-sized pieces using a sharp knife, and carefully move them to a baking sheet with a rubber spatula.
- Allow the mints to dry and set overnight. Once dried, store the butter mints in an airtight container to maintain freshness.
Ingredients
- 1/2 cup softened butter (equivalent to 1 stick)
- 4 cups powdered sugar
- 1 tablespoon half and half
- 1 teaspoon vanilla extract
- 1/4 teaspoon peppermint oil
- A dash of salt
- Yellow food coloring (2 drops, or any color of your choice)
Nutritional Values
Calories: 1960kcal | Carbohydrates: 312g | Fat: 68g | Saturated Fat: 51g | Polyunsaturated Fat: N/A | Cholesterol: 320mg | Sodium: 608mg | Sugar: 288g
FAQ
- Can I use a different flavor extract instead of peppermint for Butter Mints?
- Yes, you can experiment with other extracts such as cotton candy or strawberry for a unique twist. Just remember that the oil to extract ratio is usually 1:4, so you’ll need 1 teaspoon of extract to match the flavor of 1/4 teaspoon of oil.
- How should I store homemade Butter Mints after they are made?
- After the mints have dried overnight, they should be stored in an airtight container to maintain their freshness and texture.
- Can Butter Mints be made in different shapes?
- Absolutely! You can use mini cookie cutters or roll the dough into balls. Just ensure they are not too large, as this may affect their drying process.
- Is it possible to use peppermint extract instead of peppermint oil for this recipe?
- Yes, you can substitute peppermint oil with extract, but you’ll need to adjust the quantity. Typically, 1 teaspoon of extract is needed to replace 1/4 teaspoon of oil due to the difference in strength.
- What is the drying time required for Butter Mints?
- The Butter Mints need to dry out overnight, so you should plan to prepare them at least a day in advance.
Tips
- Plan Ahead for Drying Time: Remember that while the recipe is straightforward, the butter mints need to dry overnight. Ensure you start the preparation at least a day in advance to account for this drying period.
- Adjust Liquid Carefully: When adding half and half, be cautious. The absorption can vary based on how the powdered sugar is packed. Add only small amounts gradually to avoid making the dough too wet.
- Peppermint Flavoring: Peppermint oil is more potent than peppermint extract, so use it sparingly. If substituting with extract, use a 4:1 ratio (1 tsp extract for every 1/4 tsp of oil) to achieve the same flavor intensity.
- Experiment with Colors and Shapes: Feel free to customize the color of your butter mints for different occasions. You can also experiment with shapes using cookie cutters, but keep them small to ensure they dry properly.
Equipment
- Stand Mixer – Essential for mixing and beating the butter and ingredients to a smooth dough.
- Food Grade Peppermint Oil – Used for flavoring the mints.
- Yellow Food Coloring (or other colors as preferred) – For coloring the mints.
- Baking Sheet – For transferring the mints to dry overnight.
- Rubber Spatula – Helpful for transferring mints to the baking sheet.