There’s something truly magical about the aroma of freshly baked bread wafting through the kitchen, isn’t there? It’s like a warm hug on a chilly day, or that comforting feeling of slipping into your favorite sweater. I remember strolling through a quaint Italian bakery last summer, the air thick with the scent of yeast and herbs, and thinking, “Why can’t I have this at home?
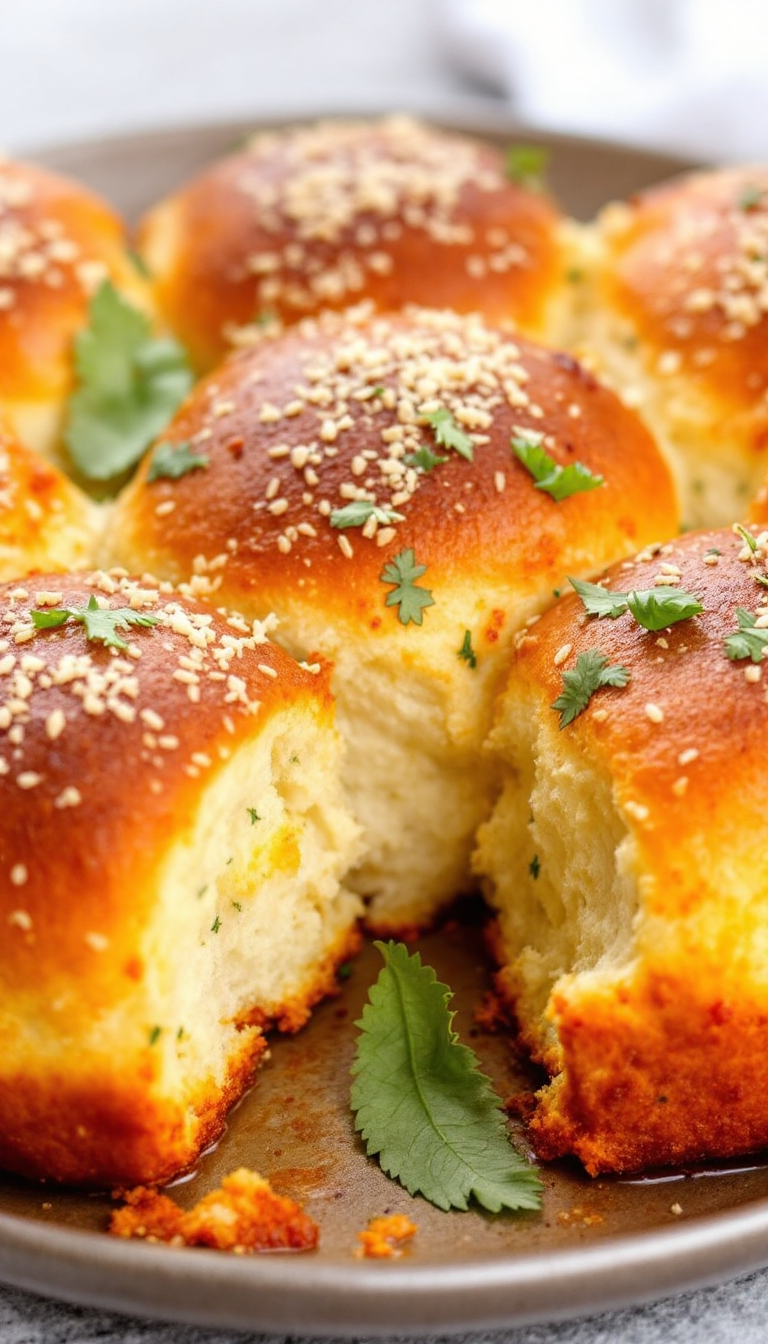
” Well, turns out, you absolutely can. These soft and chewy Italian dinner rolls—oh, they’re like little pillows of joy—have become my go-to for family dinners and unexpected guests. Each bite is a delightful embrace, just like those evenings spent with good friends, laughter echoing, wine flowing.
And trust me, these rolls will have everyone reaching for seconds, if not thirds. So, let’s get our hands a little doughy, shall we?
Steps
- Dissolve the yeast in warm water in a mixing bowl and let it sit for about 10 minutes until it becomes creamy. Gradually mix in the flour, one cup at a time, and add the salt. Once the dough becomes too thick to stir, knead it by hand on a lightly floured surface for 8 to 10 minutes until it is solid and elastic.
- For mixing with a machine, combine the yeast and water in the mixer bowl and let it stand for 10 minutes until creamy. Add the flour and salt, mixing with the paddle attachment until the dough pulls away from the bowl sides. Switch to the dough hook and knead for 3 to 4 minutes until the dough is firm and elastic.
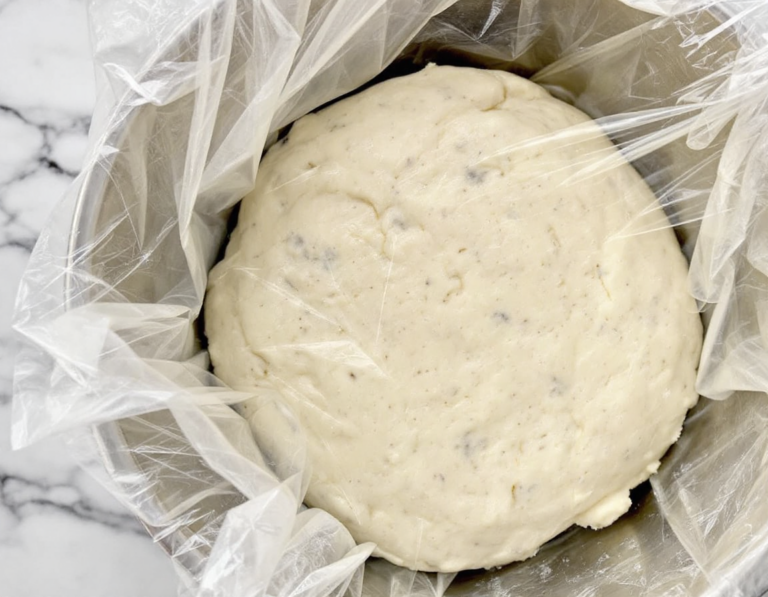
- Transfer the dough to a lightly oiled bowl, cover it tightly with plastic wrap, and let it rise for about an hour until it doubles in size.
- Divide the dough into ten equal parts and shape each piece into a ball. Lightly oil each ball and let them rest for 10 minutes under a towel. Create a deep indentation down the center of each ball using the edge of your hand and place them, indentation side down, on floured parchment or brown paper. Cover with a towel and let them rise for another hour until doubled.
- Preheat the oven to 425°F. Before baking, flip each roll over and press the indentation again. Arrange the rolls, indentation side up, on an oiled baking sheet. Bake for 15 to 18 minutes, misting the oven with water three times during the first 10 minutes. Cool the rolls on a rack.
Ingredients
- 2 1/4 teaspoons active dry yeast (1 package; 0.2 ounce; 7 grams)
- 1 1/4 cups warm water (10.5 ounces; 300 grams)
- 3 3/4 cups unbleached all-purpose flour (17.5 ounces; 500 grams)
- 2 teaspoons salt (0.4 ounce; 10 grams)
- Olive oil for brushing
Nutritional Values
Calories: 1970 | Fat: 20g | Saturated Fat: 0g | Cholesterol: 0mg | Sodium: 3900mg | Carbohydrates: 390g | Dietary Fiber: 20g | Sugars: 0g | Protein: 60g | Vitamin C: 0mg | Calcium: 90mg | Iron: 20mg | Potassium: 620mg
FAQ
- Can I use instant yeast instead of active dry yeast for this recipe?
- Yes, you can substitute instant yeast for active dry yeast in this recipe. However, you should reduce the amount slightly, as instant yeast is more potent. You can use approximately 1 3/4 teaspoons of instant yeast.
- What is the purpose of making an indentation in the dough balls?
- Creating a deep indentation in each dough ball helps form the distinctive shape of Semelle rolls. It ensures the rolls have an attractive appearance and contributes to their even baking.
- How can I tell when the dough has doubled in size during the first rise?
- To check if the dough has doubled in size, gently press your finger into the dough. If the indentation remains, the dough is ready. If it springs back, give it more time to rise.
- Why do I need to spray the oven with water while baking?
- Spraying the oven with water creates steam, which helps achieve a crispy crust on the rolls. This technique is often used in baking to improve the texture and appearance of the bread.
- Can I prepare the dough in advance and bake it later?
- Yes, you can prepare the dough in advance. After the first rise, you can refrigerate the dough overnight. Allow it to come to room temperature and complete the second rise before shaping and baking.
Tips
- For optimal results, ensure the yeast and water mixture is left to sit until it becomes creamy, which usually takes about 10 minutes. This step is crucial for activating the yeast properly.
- When kneading the dough, whether by hand or using a mixer, aim for a smooth and elastic texture. This typically takes 8-10 minutes by hand and 3-4 minutes with a mixer.
- Remember to press firmly when creating the indentation in the dough balls during shaping. This indentation helps give the rolls their distinctive look and should be emphasized again just before baking.
- To achieve a crispy crust, spray the oven with water three times during the first 10 minutes of baking. This helps create steam, which contributes to a better crust texture.
Equipment
- Stand mixer with paddle and dough hook attachments
- Baking sheet
- Plastic wrap
- Parchment paper